Recipes

Posts mit dem Label Dessert werden angezeigt. Alle Posts anzeigen

14.09.2011

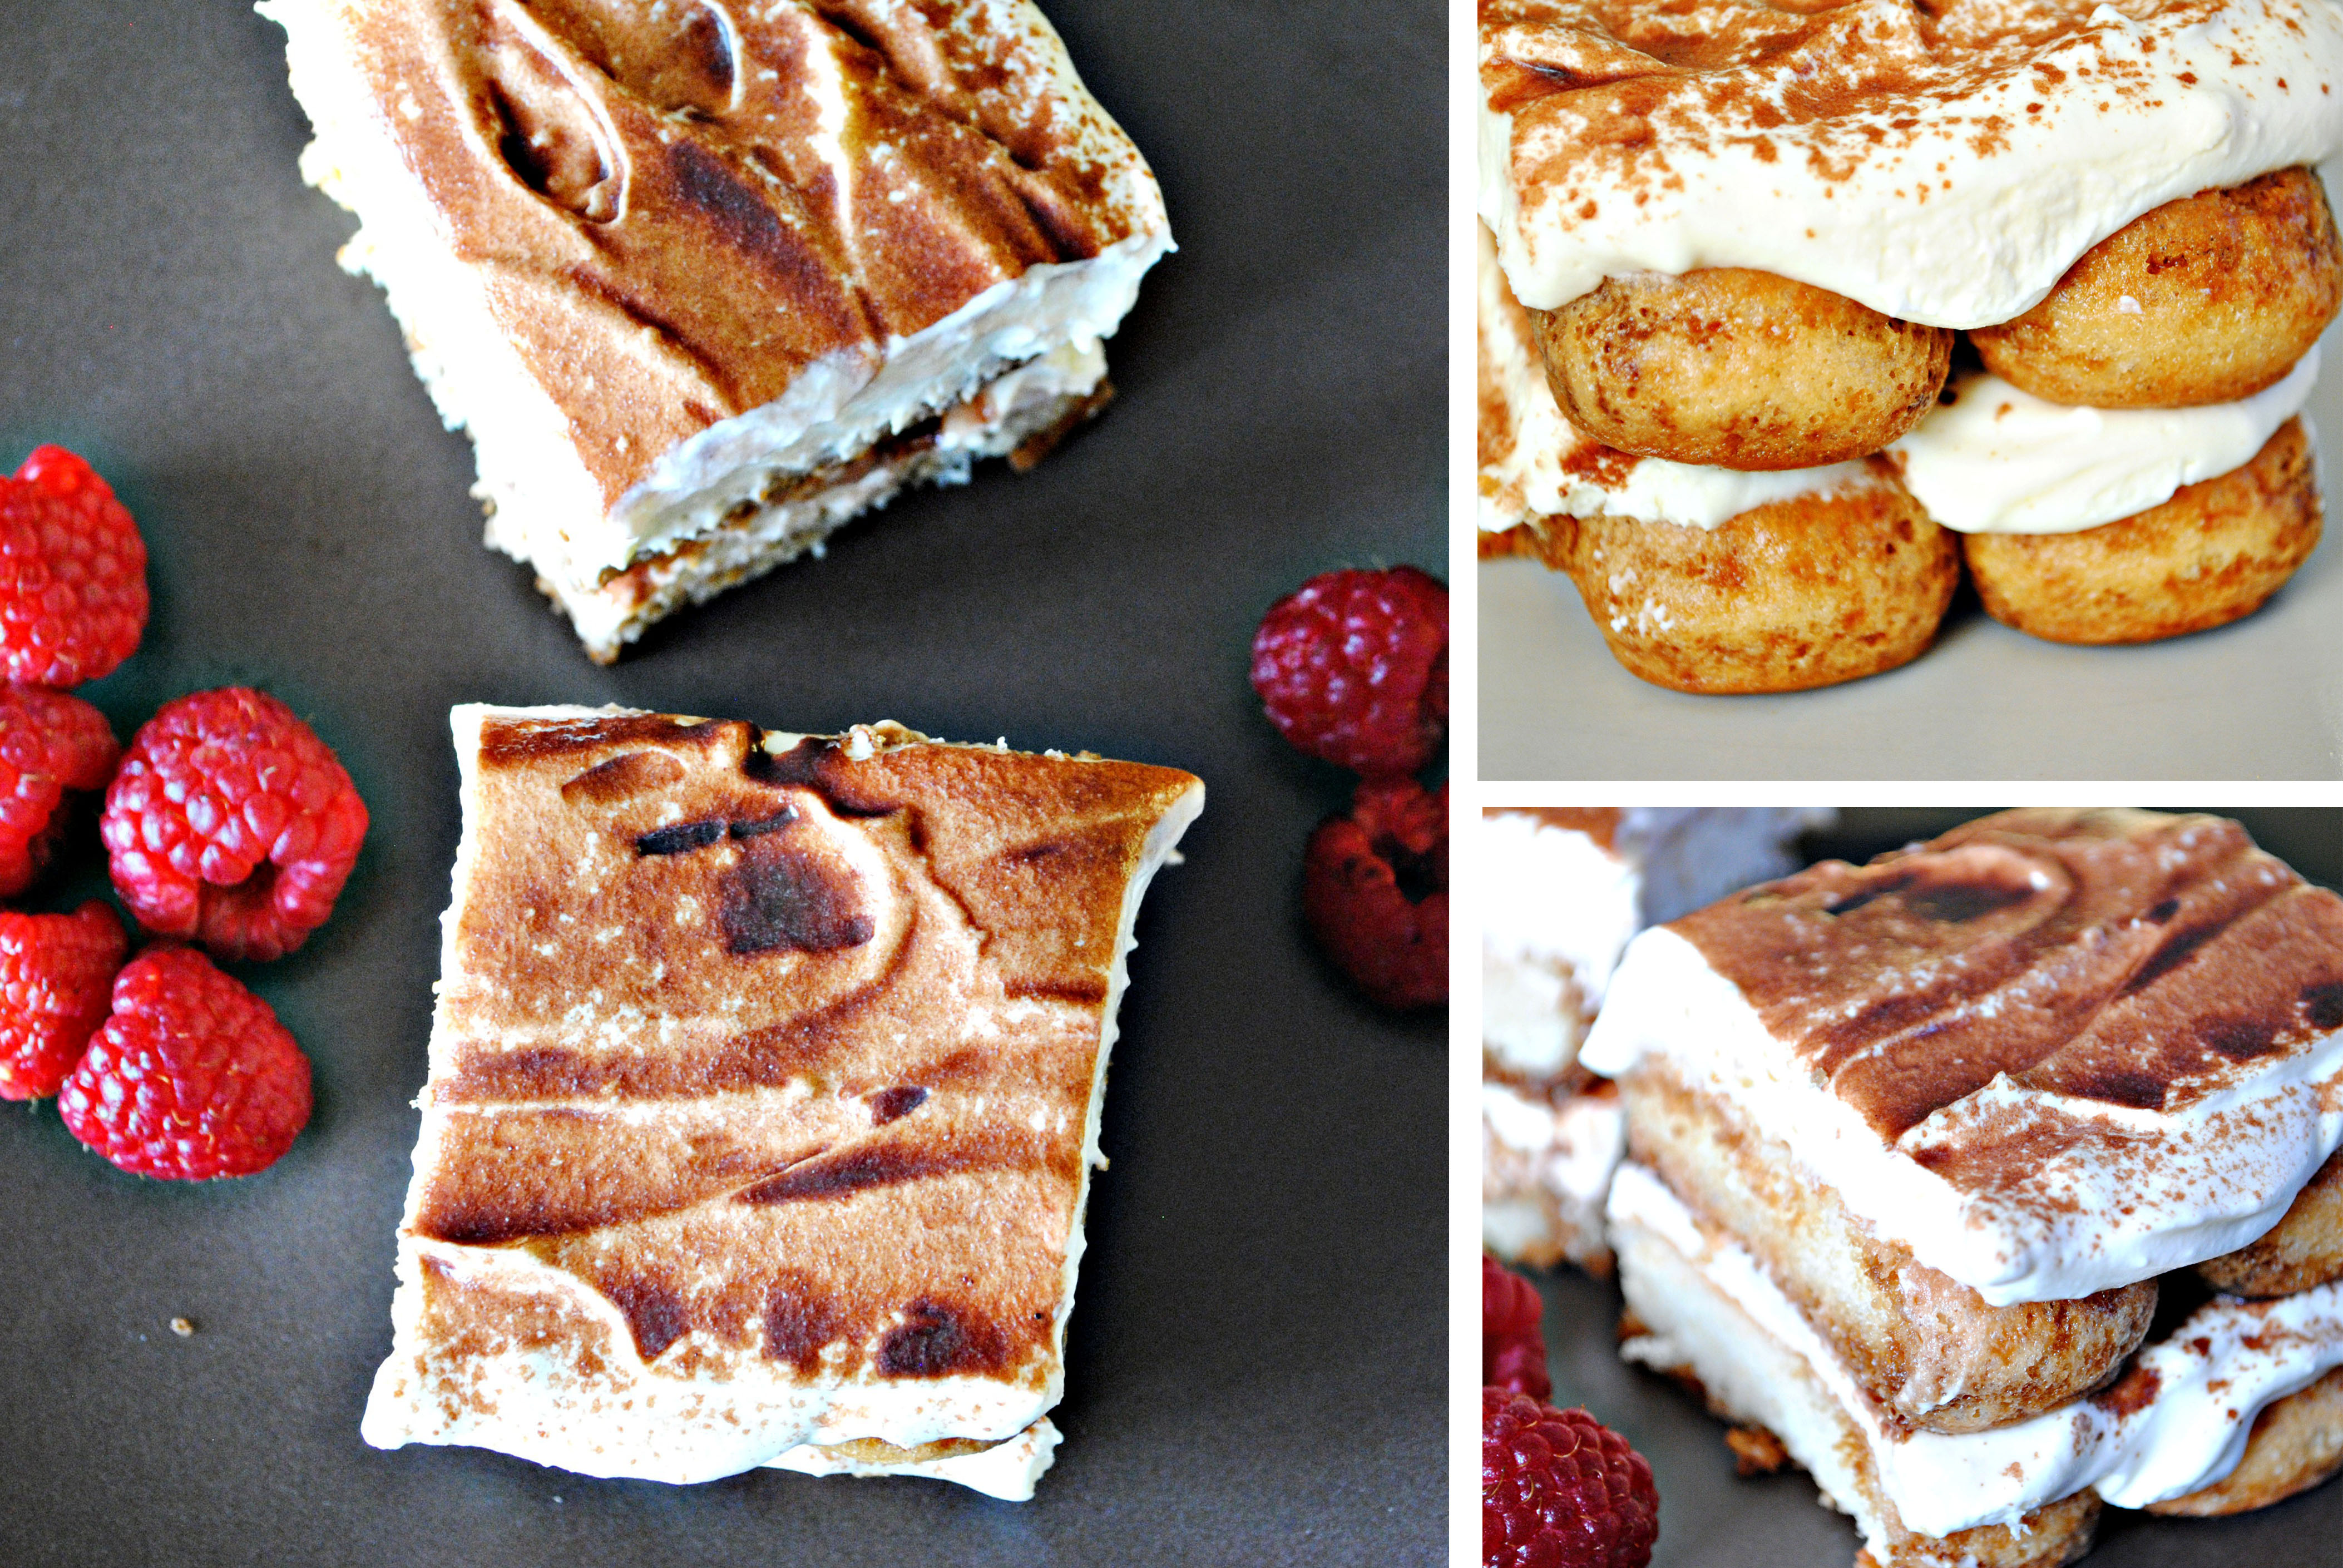
The Original Tiramisu Without Eggs


I have never ever ordered Tiramisu in a restaurant... And I probably never will, unless they specifically confirm to a 100% that they don't use eggs in their Tiramisu. I won't have it with eggs. I seem to have a weird but pretty serious raw-egg-phobia... Maybe I should go to therapy? Just thinking about raw, gooey, slimy, wet eggs makes me want to... never mind.
So here is my way of making Tiramisu. Fo once, not squashed into verrines and without any fancy additions like frozen raspberries, or caramelized plums... Just plain jane Tiramisu like old Nonnas used to make in Italy. Perfectly easy, quickly done and I'm pretty sure it tastes almost as good as Tiramisu with eggs! But I'm not the one to judge here. One thing's of sure: I DID IT MY WAY ~


Ingredients 


(makes one 14x20cm gratin pan)
  • 200g mascarpone
  • 200ml low fat cream
  • 2 tablespoons powdered sugar
  • 1,5 tablespoons cognac
  • 300ml strong coffee
  • 12-14 lady fingers
  • unsweetened cocoa powder

Preparation

Whip the cream on medium-high speed, gradually add in the sugar and beat on high speed until medium stiff peaks form.

In the bowl of your stand mixer, cream the mascarpone on low speed with the cognac. Using your spatula, fold the whipped cream into the mascarpone until smooth and combined.

Quickly dip the ladyfingers into the coffee to moist all sides (not too long though, or they will fall apart!) Place them into the gratin form. 1 layer fits 6-7 ladyfingers. Using a spoon or spatula, spread half of the cream onto the ladyfingers and sprinkle some cocoa powder onto the cream. Add another layer of ladyfingers onto the cream, proceeding with the coffee like the first time. Spread the remaining portion of cream onto the top and smooth out with a spoon or spatula. Sprinkle a thin layer of cocoa powder onto the top and refridgerate over night, or at least 8-10 hours.
12.09.2011


I'm currently suffering from a plum overdose... I guess it's one of the side effects from having a huge plum tree in the garden which stubbornly continues to bear tonns of plums, despite all the trimming we're doing. Luckily (for the tree) the whole family loves plums and we love them even more knowing that they are completely pesticide-free and come from only a few metres from our porch! We literally watch the plums grow throughout the summer. Starting from tiny white blossoms which gradually turn into beautifully firm, juicy and dark purple fruits.


Ingredients


(makes one 35cm tart)
  • 15-20 plums, depending on their size
  • 1 ready made tart dough (Kuchenteig)
  • 30gr ground almonds + 30gr ground almonds for filling
  • 2 large eggs
  • 200ml milk
  • 200ml cream
  • 1/2 teaspoon cinnamon
  • juice of 1/2 lemon
  • zest of 1/2 lemon
  • 1 tablespoon brown sugar
  • 2 teaspoons corn starch
  • 1/2 teaspoon salt
Preparation

Preheat oven to 200°C. Line a round cake pan with baking paper. Place the ready made round dough into the pan and flatten out with your hands. Poke holes into the bottom of the dough with a fork. Bake the dough on it's own in the preheated oven for 10-15 minutes. Take out and sprinkle 30gr of almond powder onto the bottom evenly.

Cut plums into halves. Divide the halves into half again. (you'll have 4 pieces out of 1 plum, correct?)
In a large bowl, whisk the eggs with milk, cream, lemon juice, zest, sugar, starch, salt, almond powder and cinnamon.

Place the plums in a spiral-like shape onto the dough. Fit in as many plums as you possibly can! The more the better... Then pour the custard over the plums and bake in the oven for up to 45 minutes. Check to see if the bottom of the dough is browned. If not, bake on bottom heat for 10 more minutes.

Serve this yummy tart with freshly whipped cream!

Chocolate Cheesecake bites


I have had many cheesecakes in my life. I mean... ALOT of cheesecakes. I've also made some cheesecakes at home. Some succesful, others... well, not as successful. But this cheesecake, ladies and gents, is by far the best cheesecake I produced with my primitive hand mixer and nearly-falling-apart-oven at home!

I

LOVE

CHEESECAKES!


Ingredients


(makes 8-10 individual cheesecakes)

Everything at room temperature please!
  • 50g digestive biscuits, crushed into crumbs
  • 1/2 tablespoon sugar
  • 2 tablespoons melted butter
  • 250g cream cheese (Philadelphia) at room temperature
  • 30g sugar
  • 1,5 tablespoons flour
  • pinch of salt
  • 1 large egg
  • pure vanilla extract
  • 50ml sour cream
  • 100g melted dark chocolate

Preparation

Preheat oven to 150°C. Line a muffin pan with 8-10 muffin forms. In a bowl, mix the digestive biscuit crumbs with the sugar and butter and mix well until the crumbs are moistened. Place 1 tablespoon of crumbs into each muffin forn and press down firmly with your fingers. Cover with wrap and place in the fridge.
In a small saucepan boil some water. Place another bowl over the saucepan, without touching the water and add chopped chocolate. Take away from heat and allow the chocolate to melt slowly. Once the chocolate has melted, take away from the waucepan and let it cool down to room temperature.
Beat cream cheese at room temperature on a low speed until smooth. Add the sugar, salt and sifted four and beat slowly until combined. Add in one large egg and continue to beat on low speed. The low speed is very important because you don’t want to beat in too much air into the batter! Don’t forget to scrape down the sides occasionally. Add in vanilla and melted chocolate (leave 2 teaspoons in the bowl for later use) and mix with a spatula. Add 50ml of sour cream at room temperature and mix for another few seconds until incorporated.
Spoon the mixture equally into the muffin forms. Drop two little drops of melted chocolate onto the top and give them a swirl with a toothpick. Bake the mini cheesecakes in the oven for 18-22 minutes. The middle should still be slightly jiggly when taken out of the oven! Leave them in the muffin pan for 30 minutes, then cool them in the fridge for at least three hours. (still in the muffin pan)
Before serving, either take off the muffin liner or leave it on. It's up to you! You can add a dollop of fresh whipped cream to the cheesecakes if you want to. I prefer them naked.

02.09.2011

Chocolate Souffles


If you're looking for a light dessert with a rich flavour, you should try making a Soufflé. This traditional French dessert is airy and fluffy in its texture, yet has a soft and wet middle which is a great contrast to the rest. It's quickly made and you can be sure to impress your guests at any time so that you'll be hearing "mmmmhhh's" for the rest of the night. Or at least until the last spoon of Soufflé has been eaten.


Ingredients
(2 servings)
  • 100g melted dark chocolate
  • 1 egg white
  • 1 egg yolk
  • 2 leveled tablespoons granulated sugar
  • 1 tablespoon all purpose flour
  • 2 tablespoons low fat milk
  • pinch of salt
  • butter and powder sugar for the ramekins

Preparation


Preheat your oven to 180°C. Butter your ramekins and coat them with a sprinkle of powdered sugar.
In a small saucepan, bring water to a boil. Turn off the heat and place a bowl over the saucepan. Add in the dark chocolate which you cut into small pieces. Let it melt.
Meanwhile, separate your egg and beat the egg white with a pinch of salt until it starts to build soft peaks. Keep beating while you add the sugar and beat until stiff peaks hold.
Once the chocolate has melted, add the milk, flour and egg yolk and stir well until all ingredients are combined. Don't let it sit for too long without stiring because the egg yolk will build lumps! Now, scoop two tablespoons of egg white snow into the chocolate mixture and stir carefully to lighten the mixture. Once you've done that, mix in the remaining egg white snow and stir again until no white streaks can be seen. Be gentle with the egg white snow, you don't want to burst all the airy bubbles... Spoon the mixture into the ramekins and bake them in the preheated oven for 15 minutes or until puffy and set. Take them out, sprinkle them with powdered sugar and serve immediately! They taste best when they are still warm. Enjoy this beautiful and hearty dessert with your loved ones!


Raspberry Tiramisù


Since I'll be leaving to Seoul in less than a month, it seems like I want my brother to have all the good things I can make before I go away for 6 months. This is his favorite dessert... Tiramisu with raspberrys. It's a really refreshing dessert and the contrast between the cold berries and the soft coffee dunked ladyfingers makes this dish into something extraordinary! The colours are beautiful, the texture is perfect, the taste is even better! The reason for making this tiramisu into individual portions is because I'm afraid I'll overeat myself... again... This way, I'll be able to control myself... I hope~


Ingredients
(makes 6 glasses)
  • 250gmascarpone
  • 1 teaspoon vanilla extract
  • 3 tablespoon brandy
  • 150 ml single cream (low fat)
  • 3 tablespoons icing sugar
  • 1 package (150-200g) of ladyfingers (spongy biscuits)
  • 200ml espresso or other strong coffee, cooled to room temp.
  • 6 handfulls of frozen raspberry (250g)
  • cocoa powder (unsweetened)

Preparation


To make the cream, beat the mascarpone with vanilla and brandy until smooth. Scrape down the sides occasionally. In another chilled bowl, beat the cream, gradually adding in the icing sugar until it is able to hold stiff peaks. Mix the whipped cream into the mascarpone mixture and mix with a spatula until combined. Taste it to see if you need more sugar.
Break your ladyfingers into 3 pieces, dip them into the coffee slightly (not too much or you'll have very wet and soggy biscuit), coating all sides with coffee. Even if the middle is still hard, don't worry, it will soak up the moisture as you leave the tiramisu to cool in the fridge. Press a layer of ladyfingers into the bottom of the glass, top with a tablespoon of mascarpone mixture, sprinkle some cocoa powder over the cheese and drop some raspberry onto it. Repeat this procedure one more time and end with a batch of mascarpone mixture. Flatten it out as best as you can and sprinkle some cocoa powder onto the top to cover up the mascarpone. Do the same with the other glasses and pop them into the fridge for at least 2-3 hours before serving! It's important to let the raspberrys defrost and to let all the flavours sink in. You don't want dry ladyfingers in a tiramisu, do you? Ok, into the fridge they go!

Tip: Tiramisu tastes even better the next day. At least, that's what I think. Try it out and you'll see!


Ginger Nectarine Tiramisù


While I was preparing to make the Raspberry Tiramisù, I came up with more Tiramisù ideas. I like to experiment with food... This is a creation of mine and my very first attempt at it! Sometimes I succeed, other times I fail. I'm not sure if this one is a success because I still didn't have a chance to taste it! I tasted the nectarine on it's own and I must say, it was pure delight. So I don't think much could go wrong when combined with the other ingredients... I'm saving one glass up for after dinner ~I will take all the time in the world to eat this while I watch some Korean drama from my sofa... Can't wait! I'll post this recipe anyway, since I'm pretty positive, it'll turn out good. If it doesn't, I'll delete it ^^


Ingredients
(makes 6 glasses)
  • 250gmascarpone
  • 1 teaspoon vanilla extract
  • 3 tablespoon brandy
  • 150 ml single cream (low fat)
  • 3 tablespoons icing sugar
  • 1 package (150-200g) of ladyfingers (spongy biscuits)
  • 1 tablespoon grated ginger
  • 150ml water
  • 3 tablespoons sugar + 1 tablespoon brown sugar
  • 2 large or 3 medium sized nectarines cut into 1cm pieces

Preparation


To make the cream, beat the mascarpone with vanilla and brandy until smooth. Scrape down the sides occasionally. In another chilled bowl, beat the cream, gradually adding in the icing sugar until it is able to hold stiff peaks. Mix the whipped cream into the mascarpone mixture and mix with a spatula until combined. Taste it to see if you need more sugar.
For the ginger syrup boil the water over medium heat, add the sugar and grated ginger and continue to boil for 5-7 minutes. Take away from heat and cool to room temperature.
To caramelize your nectarines, place them in a saucepan, sprinkle 1 tablespoon of brown sugar over then and let them become soft. The amount of sugar depends on the sweetness of the fruit. You might have to add more.
Break your ladyfingers into 3 pieces, dip them into the ginger syrup slightly (not too much or you'll have very wet and soggy biscuit), coating all sides with the syrup. Even if the middle is still hard, don't worry, it will soak up the moisture as you leave the tiramisu to cool in the fridge. Press a layer of ladyfingers into the bottom of the glass, top with a tablespoon of mascarpone mixture. Then place a tablespoon full of caramelized nectarines onto the mascarpone. Repeat this procedure one more time and end with the fruit on top. You could cover it up with more mascarpone, but I like the look of the fruit on tap. Do the same with the other glasses and pop them into the fridge for at least 2-3 hours before serving! This is the most important procedure of making tiramisu. Being able to wait until it's ready. You have to let the flavours combine, plus the ladyfingers have to soak up all the moisture around it. You do not want to have crunchy bits in your tiramisu!
Tip: Tiramisu tastes even better the next day. At least, that's what I think. Try it out and you'll see!


Chai Spiced Plum Tiramisù


Mhhhh Chai lattes... I love 'em! Too bad there isn't a single Starbucks in my vicinity! Wait... maybe that's a good thing! Good for my wallet. Luckily I cam able to buy Chai tea in tea bags around the corner in the grocery store, which gave me this incredible idea of a Tiramisù creation! The spices of Chai might remind you of winter wicause of the cinnamon and all, but the fruityness of the plum makes this Tiramisù edible even during hot summer days~ Just like the Ginger-Nectarine Tiramisù, this is also a premier... Confession: I didn't try it yet! But I will! I know, I shouldn't be posting recipes before trying them, but I couldn't resist! I wanted ya'll to see how creative I was today! Oh, and in case you were wondering: I didn't make 3x6 glasses of tiramisu today! I simply divided the flavours between the 6 glasses. Two of each and one more raspberry one.


Ingredients
(makes 6 glasses)
  • 250gmascarpone
  • 1 teaspoon vanilla extract
  • 3 tablespoon brandy
  • 150 ml single cream (low fat)
  • 3 tablespoons icing sugar
  • 1 package (150-200g) of ladyfingers (spongy biscuits)
  • 200ml freshly brewed Chai tea with 2 teaspoons honey, cooled to room temp.
  • 6 plums
  • 3 teaspoons cinnamon sugar + 2 teaspoons for compote

Preparation


To make the cream, beat the mascarpone with vanilla and brandy until smooth. Scrape down the sides occasionally. In another chilled bowl, beat the cream, gradually adding in the icing sugar until it is able to hold stiff peaks. Mix the whipped cream into the mascarpone mixture and mix with a spatula until combined. Taste it to see if you need more sugar.
To make the chai tea, boil some water and pour over tea bag (or even better, real tea leaves and chai spice!)
Plum compote is really easy to make. If your plums are sweet, just add 2 teaspoons of sinnamon sugar, 2 teaspoons of water and let it simmer over medium heat in a pan.
Break your ladyfingers into 3 pieces, dip them into the chai tea slightly (not too much or you'll have very wet and soggy biscuit), coating all sides with coffee. Even if the middle is still hard, don't worry, it will soak up the moisture as you leave the tiramisu to cool in the fridge. Press a layer of ladyfingers into the bottom of the glass, top with a tablespoon of mascarpone mixture, sprinkle about 1/2 teaspoon of cinnamon sugar over the cheese and carefully place a tablespoon of plum compote onto it. Repeat this procedure one more time and end with the fruit compote. Sprinkle some cinnamon onto the fruit. Do the same with the other glasses and pop them into the fridge for at least 2-3 hours before serving! This will help combine all the flavours. It's also important to give the ladyfingers time to soak up all the moisture around them.

Tip: Tiramisu tastes even better the next day. At least, that's what I think. Try it out and you'll see!


Individual New York Cheesecakes


Cheesecake has become one of my favorite desserts this summer... I've made it countless times in many different ways, researching the internet for hours for the perfect recipe... Finally... I've found it. This is my personal favorite! They look so cute!!!!! It's really important that all your ingredients are at room temperature for this recipe! Crucial, even...


Ingredients


(makes 8 individual cheesecakes)
Adapted from http://www.joyofbaking.com/

Everything at room temperature please!
  • 50g digestive biscuits, crushed into crumbs
  • 1/2 tablespoon sugar
  • 2 tablespoons melted butter
  • 250g cream cheese (Philadelphia) at room temperature
  • 50g sugar
  • 1,5 tablespoons flour
  • pinch of salt
  • 1 large egg
  • pure vanilla extract
  • 1/2 teaspoon lemon zest
  • 50ml sour cream
  • raspberry jam

Preparation


Preheat oven to 150°C. Line a muffin pan with 8 muffin forms. In a bowl, mix the digestive biscuit crumbs with the sugar and butter and mix well until the crumbs are moistened. Place 1 tablespoon of crumbs into each muffin forn and press down firmly with your fingers. Cover with wrap and place in the fridge. Beat cream cheese at room temperature on a low speed until smooth. Add the sugar, salt and sifted four and beat slowly until combined. Add in one large egg and continue to beat on low speed. The low speed is very important because you don't want to beat in too much air into the batter! Don't forget to scrape down the sides occasionally. Add vanilla and lemon zest. Add 50ml of sour cream at room temperature and mix for another few seconds until incorporated.
Spoon the mixture equally into the muffin forms. Drop two little drops of raspberry jam onto the top and give them a swirl with a toothpick. Bake the mini cheesecakes in the oven for 18-22 minutes. The middle should still be slightly jiggly when taken out of the oven! Leave them in the muffin pan for 30 minutes, them cool them in the fridge for at least three hours. (still in the muffin pan)

Tip: Serve with raspberry sauce or fresh berries!


Chocolate Mousse With Chesnut Puree


My good friend Samuel invited me to his house with two other great friends to have dinner. Samuel cooked the main course and I suggested to bring dessert. This is what turned out...


Let me show you how I made my creation of Chocolate mousse with Chesnut Puree. Oh yeah, it was delicious~ As you can see, this mousse has 5 layers. You can arrange the layers however you want to, I thought it looked nice this way! The bottom layer is ready-made Chesnut puree, the second is Chocolate Mousse, the third is Chocolate Ganache, then another layer of Chocolate Mousse and finally, crowned with whipped cream.

Ingredients (makes 8 small glasses or 4 bigger ones)
  • 1 Tube Chesnut Puree
Chocolate button for decoration
  • 30gr dark chocolate, melted
Mousse
  • 120g dark chocolate, chopped
  • 4 tablespoons milk
  • 25gr (3 tablespoons) butter
  • 200ml heavy cream, cold
Ganache
  • 90gr dark chocolate
  • 60ml heavy cream
Whipped cream
  • 80ml single cream (reduced fat)

Preparation


Chesnut Puree
Squeeze a layer of chesnut puree into the bottom of the glass. The tubes come with a sort of spaghetti tip to make the funny noodle-like shape.

Chocolate button
Melt the chocolate in a bowl over simmering water. Spoon onto a piece of baking paper and shape little round buttons. Refrigerate until hardened.

Mousse
In a bowl set over a pan of simmering water, melt together the chocolate, milk and butter. Remove from heat and let cool to room temperature. In a mixer, whip the cream to medium peaks and fold into the chocolatemixture. Pipe the mousse into the glasses on top of the chesnut mousse. (You can do one layer of chocolate mousse, or divide the mixture into 2 batches. If you do so, refrigerate the second half in the fridge for later usage.) Refrigerate and let cool completely before the next step!

Chocolate Ganache
In a small heavy saucepanset over medium high heat, bring the cream to a boil. Place the chocolate into a medium sized bowl and pour the hot cream over it. Let the mixture stand for 2 to 3 minutes. Gently stir the cream and chocolate together with a spatula until the mixture comes together and is fully combined. Let cool completely before dividing it on top of the chocolate mousse! Do so with a little spoon. Refrigerate again until cooled completely. Then add another layer of chocolate mousse.

Whipped cream
Whip the cream to soft peaks  or until it is able to hold it's shape. Spoon onto the top of the glass and even it our flatly! To decorate, place a piece of chocolate button into the whipped cream.


Matcha Red Bean Rolls


Korean desserts are often composed with either green tea or sweet red beans. You can have green tea ice cream, green tea rice cakes, red bean rice cakes, red beans on shaved ice with green tea ice cream... As you can see, there's a whole lot to choose from! For the dessert buffet I prepared yesterday, I decided to make the following recipe: Matcha spongecake with sweet red bean filling! Perfect harmony... just perfect.


Ingredients


(Makes 2 sheets of sponge cake in 15cm square molds, adapted from www. shizuokagourmet.wordpress.com)

Sponge cake batter
  • 2 large eggs, room temperatue
  • 2 tablespoons sugar
  • 2 tablespoons flour, sifted
  • 2 teaspoons matcha powder
  • 1 teaspoon vanilla essence
Sweet bean paste filling
  • 400g dried red beans
  • 200g sugar
  • 5 tablespoons water
  • pinch of salt

Preparation


Soak the dried red beans (pat) in water over night.
Boil the red beans with new water in a large pot with a pinch of salt until the beans are soft and cracked. Drain water and pour the beans into a food processor. Blend until beans are smooth but still have some bitey bits to it. Scoop the beans into a saucepan, add the water and sugar and simmer over low heat. Stir occasionally to prevent from burning. The beans will turn darker in colour and the texture should be easy to spread.
Preheat oven to 200°C. Beat the eggs at room temperature in a stand mixer, mix for 4 minutes until foamy and thick. Keep beating while you add in the sugar, matcha powder and sift in the flour. Once the mixture is bubbly and thick, pour half of the mixture into the baking tray lined with baking paper. Bake for 8-10 minutes. In the meantime lay out a clean kitchen cloth onto a flat surface. Dampen the cloth with wet hands or with a water spray. Take the batter out and tip the batter facedown onto the cloth. Leave it to cool down. Once it has cooled down completely, take off the baking sheet carefully.  Spread the bean paste evenly onto the squares and either 1. roll the spongecake into roll-cakes, which will give you a spiral shape when cut, or 2. simply spread a little bit more red bean paste onto the sponge and roll them into "tunnel-like" cakes as shown in the picture above!


Banana Cheesecake


Yesterday I went to a grocery store to buy some eggs. While I was waiting to pay, I saw some yummy looking, very ripe bananas which has already turned a dark brown... I took a bunch and put them on the counter to pay aswell. The lady kindly told me that she'd throwm them in for free! Yaay! Free ripe bananas! So I rushed back home and baked some delicious Banana recipes. One of them turned out a Banana Cheesecake. I never had cheesecake in this combination before so I was very excited to see how the outcome would be. I couldn't be happier!


Ingredients


(makes 8 individual cheesecakes)
Everything at room temperature please!
  • 60g digestive biscuits, crushed into crumbs
  • 1/2 tablespoon sugar
  • 2 tablespoons melted butter
  • 250g cream cheese (Philadelphia) at room temperature
  • 50g sugar
  • 1,5 tablespoons flour
  • pinch of salt
  • 1 large egg
  • 1 very ripe banana
  • pure vanilla extract
  • 1/2 teaspoon lemon zest
  • 50ml sour cream

Preparation


Preheat oven to 150°C. Line a muffin pan with 8 muffin forms. In a bowl, mix the digestive biscuit crumbs with the sugar and butter and mix well until the crumbs are moistened. Place 1 tablespoon of crumbs into each muffin forn and press down firmly with your fingers. Cover with wrap and place in the fridge. Mash 2/3 of the banana in the stand mixer bowl with a fork until no more pieces are seen. Beat cream cheese at room temperature on a low speed with the mashed banana until smooth. Add the sugar, salt and sifted four and beat slowly until combined. Add in one large egg and continue to beat on low speed. The low speed is very important because you don’t want to beat in too much air into the batter! Don’t forget to scrape down the sides occasionally. Add vanilla and lemon zest. Add 50ml of sour cream at room temperature and mix for another few seconds until incorporated.
Spoon the mixture equally into the muffin forms. Slice the remaining banana into thin pieces and place one slice onto each mini cheesecake. Bake the mini cheesecakes in the oven for 18-22 minutes. The middle should still be slightly jiggly when taken out of the oven! Leave them in the muffin pan for 30 minutes, then cool them in the fridge for at least three hours. (still in the muffin pan) Take them out of the muffin pan just before serving. You can either leave the wrapper on or take it off...


Linzer Torte


I was actually planning on losing some weight before I depart to Seoul... No success... 10 guesses why I can't lose weight? Check out this recipe and you'll know why~


Ingredients
(makes one 39x26cm pan)
  • 300g all purpose flour
  • 250g granulated sugar
  • 200g melted butter
  • 250g ground nut powder (hazlenut and almond)
  • 2 teaspoons cinnamon
  • 2 eggs
  • 1/2 teaspoon ground cloves (optional)
  • 2 teaspoons baking powder
  • 1/2 teaspoon salt
  • 1/2 teaspoon vanilla essence
  • 2 pots of jam (raspberrie jam, strawberry jam...)
  • zest of 1 lemon + juice of half
Preparation

Preheat oven to 180°C. In a large bowl, mix together all the dry ingredients (flour, sugar, nuts...)and mix with a whisk. Add in the melted butter, eggs, lemon zest, juice and vanilla and mix well with a spatula until everything is moist. Prepare a baking pan and lay out a sheet of baking paper. Now, working with your hands, press the dough into the pan equally, leaving 1 heaped handfull of dough aside (wrap and put in fridge)! The dough should be about 1/2 cm-1cm thick when placed in pan. With a spoon, spread an equal amount of jam onto the dough. The thickness depends on the sweetness you want to achieve. Sprinkle some flour onto the remaining dough you've kept aside. Working with your hands, roll some dough into stripes and place them diagonally onto the jam. Working from one corner to the other. Build a grid-like structure. (See picture below for help) Place the tray in the oven and bake for 35-40 minutes. Take out and cut into individual sized squares. You can freeze the individual pieces in freezing bags and keep them for several months!